Summary
This article provides an overview of Zoom integration with Canvas, when to use it, and instructions for scheduling a Zoom meeting using the integration.
Body
Quick Links: | Enable Zoom | Schedule Meeting | Start Meeting | Record Meeting & Embed Recording into Canvas |
This article provides an overview of Zoom integration with Canvas, when to use it, and instructions for scheduling a Zoom meeting using the integration.

Canvas provides a direct integration with Zoom that allows instructors to:
- Schedule / Start a Zoom meeting directly from your Canvas course.
- Import Zoom attendance and poll reports to the Canvas gradebook
- Create schedules with time slots that people can book to meet with you
Enable the Zoom Integration
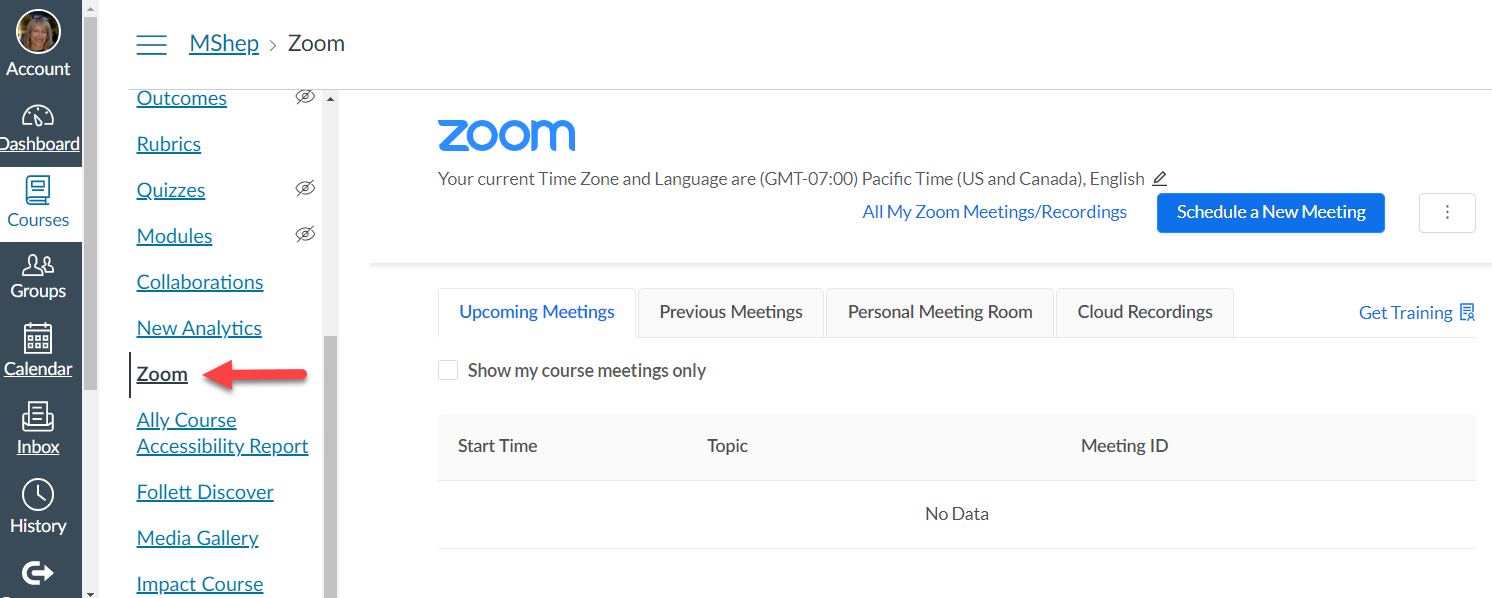
Students access the Zoom meetings from the Zoom menu in Canvas as shown on the right.
-
From your Canvas course menu, select Settings.
-
Select the Navigation tab.
-
Hover to the right of the Zoom integration and select Enable.

-
Scroll to the bottom of the page and select Save.
Schedule a Zoom Meeting
-
From your course menu, select Zoom.

-
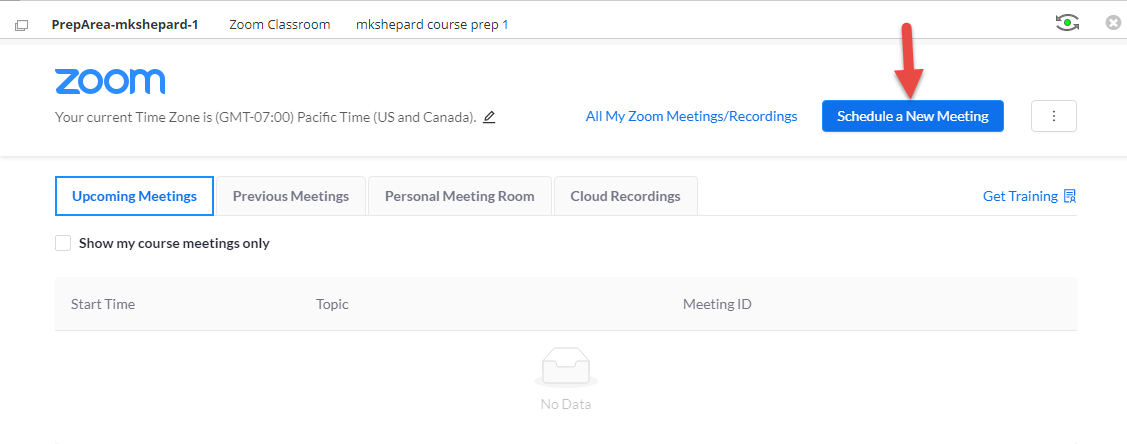
Select Schedule a New Meeting.

-
Enter a Topic. For example, BIOL 100 Live Meeting
-
From When, select the date your first class starts.
-
Select the Duration of your class meeting. Don't worry, as the host of the meeting you can start and end it whenever you want.
-
Select Recurring meeting.
-
You will typically select Weekly and enter the days the meeting takes place.
Some faculty choose to create a No Fixed Time recurrence so that the meetings do not all populate on the Canvas course calendar and Syllabus tool.

-
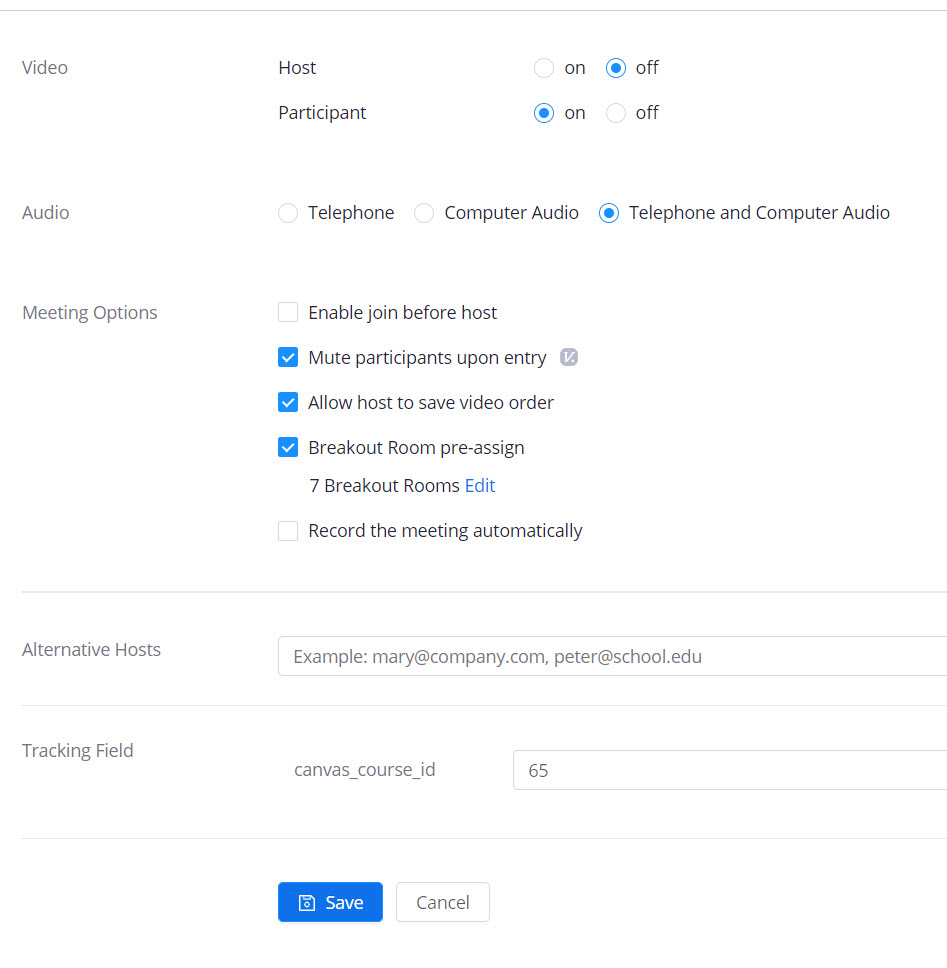
Scroll down and select your desired options. Note these are optional settings.

-
Select Only authenticated users can join to help ensure only those who authenticated Chico State Zoom users can join.
Note: Please select the above option AFTER the first week of class as many students are new to the Zoom authentication at Chico State.
-
Enable Join before Host, only if you are OK with students joining the meeting before you. If you choose to enable, do NOT select automatic recording.
-
Allow host to save video order requires Only Authenticated Users Can Join be selected.
-
Breakout Room Pre-Assign
-
Only one set of pre-assignments can be configured for a meeting. These assignments can be adjusted and changed, but it is not possible to store multiple sets of pre-assignments for one meeting or meeting series.
-
If you scheduled recurring meetings, the pre-assigned breakout rooms will only work if it's applied to all meetings in the recurrence. You can't edit a single meeting in the recurrence and apply a unique pre-assignment.
-
Select Record Meeting Automatically, IF you need to post a recording of the class session, and you feel you will forget to start the recording.
-
Select Save.
-
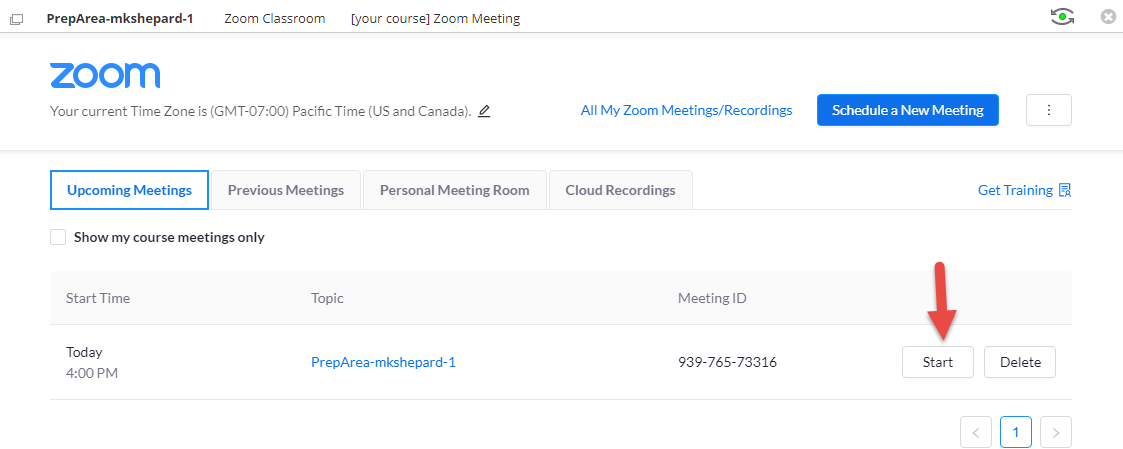
Select Start to finish creating the meeting and before students can access.
When students click on the meeting link from Canvas, the password is automatically appended to the meeting link.
Start your Zoom Meeting from Canvas
-
Access your Canvas course.
-
Select the Zoom link on your course menu to bring up your Zoom meetings.
-
Select Start next to the meeting for your course.

-
It will recognize you as the host of your meeting.
-
If prompted, select Join by Computer Audio. How to Share your Audio and Video.
 =
=
Issues starting the meeting?
Sign into Zoom from the desktop client application using SSO to ensure you have Host permissions and that someone else is not already logged in if you are on a classroom computer.
Record Meeting & Embed the Recording into Canvas
-
Faculty can record their Zoom meetings to the Zoom cloud by choosing the Record to Cloud option.
-
Zoom cloud recordings are automatically transferred to Kaltura, Chico State's media server for longer-term storage.
-
Refer to the instructions to embed a Kaltura recording into your Canvas course.
Still need help? Faculty and staff can reach out to the Technology & Learning Program. Students can reach out to the Center for Technology Equity.
Help us improve our Knowledge Base! Select Yes or No below, then let us know what worked—or what didn’t. Your feedback helps us improve our content and provide the best possible support.